How to install Kubernetes K3s on a Raspberry Pi 5
My main goal for this Raspberry Pi is to deploy some websites and other services. There are many ways to do this but for me I wanted to mirror a proper production environment. Since I work as a Devops Engineer, I decided to go for Kubernetes, precisely k3s.
Why Choose Kubernetes for your home lab?
Kubernetes adds complexity, but it also brings a lot of quality of life once you understand the basics. It helps keep your apps running by automatically restarting crashed processes, scales it automatically and rolling out updates without downtime.
However, Kubernetes adds also a lot of overhead. Thus I choose K3s instead of a full Kubernetes setup; this way we get a lighter distribution that is much better suited for a Raspberry Pi. As we will see, k3s is quite easy to set up.
How to install and configure Kubernetes K3s?
Step 1: Enabling Linux Control Groups (cgroups)
Kubernetes relies on a Linux kernel feature called cgroups (Control Groups). Cgroups allow the OS to allocate and limit resources (CPU, RAM, Network) to specific processes. In our case, Kubernetes will need this to be able to run our containers.
By default, some light OS that run on Raspberry Pi may have memory tracking disabled to save a bit of overhead. Let's make sure it is enabled. Otherwise, Kubernetes will try to start, realize it has no way to enforce RAM limits on pods, and immediately crash. Thus, we need to add these flags to the Linux kernel to initialize these tracking modules at boot time.
Run this command to open your kernel boot configuration:
sudo nano /boot/firmware/cmdline.txtAnd add this to the end of the existing line (unless it is already present). Beware: Always keep this file as a single line, do not add a new line.
cgroup_enable=cpuset cgroup_memory=1 cgroup_enable=memoryThen:
sudo rebootStep 2: Running the K3s Installation Script
K3s requires iptables to manage network rules. Install it with:
sudo apt update && sudo apt install -y iptablesThen you can install k3s using this command:
# Replace 192.168.x.x with your Pi's static IP
curl -sfL https://get.k3s.io | sh -s - \
--node-ip=192.168.x.xWhat this does is download a script from https://get.k3s.io which detects your CPU architecture (in this case ARM64) and downloads the correct binary. Then it installs k3s and creates a systemd unit file (/etc/systemd/system/k3s.service). This ensures that if the Pi loses power and reboots, Kubernetes starts up automatically before you even log in.
The parameter Node-ip is quite essential. A node in Kubernetes is a machine/server, in this case your Pi. Here you need to give your Pi IP address on your local network.
Warning: Make sure to use the static IP address you configured in the previous chapter. If you use an IP that is dynamic, your cluster might break if the router assigns a different address later.
But the K3s installation script has many other parameters, here are two others that you might want to use depending on your use case:
--flannel-backend=wireguard-native: This is most useful when you are using k3s in a cluster with multiple servers and you want a secure connection between nodes but it adds a small overhead.
--secrets-encryption: Encrypts Kubernetes secrets at rest. This is a good security option if you store sensitive data in Secrets but adds overhead as well.
For a more repeatable setup, you can also use a K3s configuration file. This file configures the Kubernetes software settings specifically.
Note on YAML: Kubernetes and K3s use YAML for configuration. In YAML, indentation matters. Always use spaces (usually 2), never tabs, and ensure your alignment is perfect.
node-ip: 192.168.x.x
flannel-backend: wireguard-native
tls-san:
- 192.168.x.xThen install K3s using that config file:
curl -sfL https://get.k3s.io | sh - \
--config config.yamlImportant Note on Architecture: The Raspberry Pi 5 uses the ARM64 architecture. When you start deploying your own apps later, always make sure the Docker images you use are compatible with ARM64 (most popular ones are).
Step 3: How to verify your initial Kubernetes cluster health
Kubernetes has two main components: the Control Plane/server (that manages everything) and the Worker Plane/agent (that runs your application). In a multi node environment we would have multiple separate machines for both the Worker and Control plane. This is to ensure the worker plane doesn't starve the control if it uses too many ressources and vice-versa. In this case we have only one node. This is ok for a small setup but less resilient to outages.
To check the status of the "Control Plane" and see the actual resource "tax" Kubernetes takes on your Pi, you can run:
kubectl get nodes
kubectl top nodes
kubectl get pods -n kube-systemYou should see something like this, although less pods than me since my set up already has many more services.
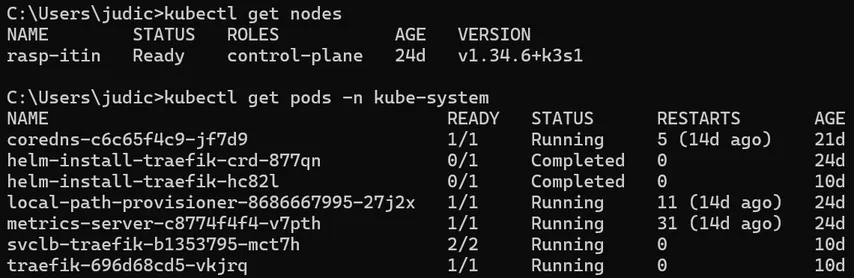
kubectl is a CLI tool that acts as a REST client. It sends JSON commands to the Kubernetes API Server on the Control Plane running on your Pi. In this case we did this:
get nodes: This lists the Kubernetes nodes and their status. This is a nice check to see if Kubernetes is working. If the status is Ready, it means the container runtime (containerd) is healthy and the networking is up.
top nodes: Shows the current CPU and RAM usage of your Pi. This is possible because K3s includes a metrics-server by default.
get pods -n kube-system: You will see several pods in the kube-system namespace. Specifically, look for:
traefik: The ingress controller responsible for routing http requests from the outside world to services inside Kubernetes.coredns: Handles internal cluster DNS.local-path-provisioner: Manages storage on your Pi.
If all is good then we are basically done and Kubernetes is installed.
Note on Namespaces: The
-n kube-systemflag tells kubectl to look into the "kube-system" namespace. Kubernetes uses namespaces to isolate groups of resources. In this case, system-level tools are kept separate from your own applications.
Step 4: How to set up your PC for remote kubectl access
Nonetheless, having to open an ssh connection every time you want to manage your cluster is annoying. So, let's install kubectl on your PC to control Kubernetes remotely (but still only from your local network):
- MacOS:
brew install kubectl - Windows:
Download from [kubernetes]https://kubernetes.io/releases/download/#binaries).
Or use:
winget install -e --id Kubernetes.kubectl - Linux:
sudo apt install kubectl
Then we need to create a config file; Kubernetes looks for a file located at
- Linux/MacOS:
~/.kube/config - Windows:
%USERPROFILE%\.kube\config
On your PC, create that file. Then go to your Raspberry Pi and run:
sudo cat /etc/rancher/k3s/k3s.yaml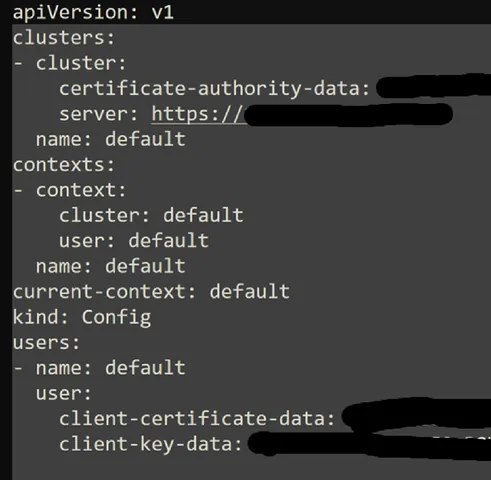
You will find something like this. Copy that text and paste it into the config file on your PC; do not modify it on the Pi.
Inside the file you just pasted on your laptop, find this line:
server: https://127.0.0.1:6443The Pi thinks the server is at 127.0.0.1 (itself). Your laptop needs to know the Pi's actual IP. Change it to:
server: https://192.168.x.x:6443(Replace with your Pi’s actual IP address).
The Pi keeps 127.0.0.1 though.
Test it: Open a terminal on your laptop and type kubectl get nodes. If you see your Pi. That’s it, the Kubernetes setup is done!
Troubleshooting Tip: If you have a firewall (like
ufw) enabled on your Pi, it might block traffic to port 6443. Make sure it is configured to allow Kubernetes traffic.
Maintenance & Uninstallation
Updating K3s: To update K3s, you simply need to run the same installation script again. It will detect the existing installation and upgrade the binaries while keeping your settings and apps intact.
Uninstalling K3s: If you ever need to start over or remove K3s, just run the built-in uninstall script:
/usr/local/bin/k3s-uninstall.shWhat Kubernetes Actually Gives Us
Before going further, let's clarify what Kubernetes actually gives us and what K3s changes compared to a normal Kubernetes installation also called k8s.
Kubernetes does more than run containers, it is a full orchestration system. Instead of manually starting containers and hoping they keep running, you describe the desired state of your system and Kubernetes tries to keep it that way.
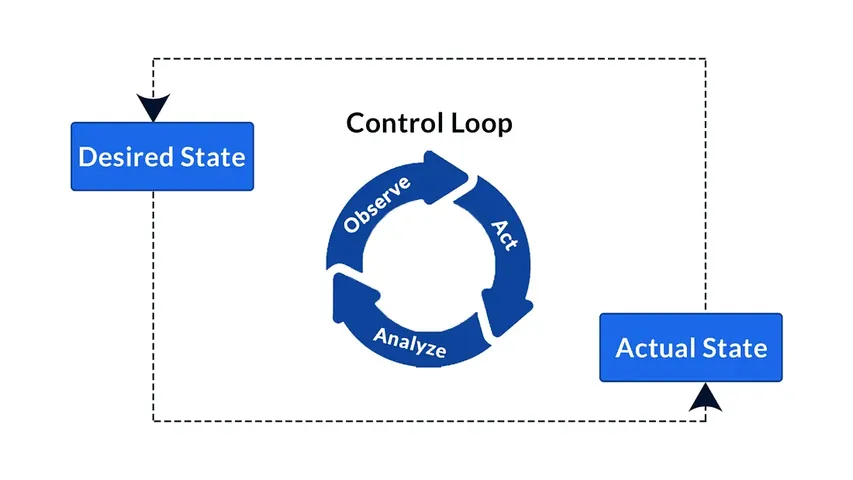
If a pod crashes, it restarts it. If a deployment is updated, it rolls out the new version such that users never see a downtime. If a node disappears, Kubernetes can reschedule workloads on another node, assuming you have a multi-node cluster. If you configure ingress, it can route external traffic to the correct app.
Kubernetes is powerful, but it is not magic. It does not remove the need to understand networking, storage, DNS, TLS, monitoring, and backups. In fact, it often forces you to learn them properly.
Do you need Kubernetes for a basic blog? Not really. But K3s is easy to install, fun to experiment with, and a great way to learn a technology used by many professional developers.
Main Kubernetes features
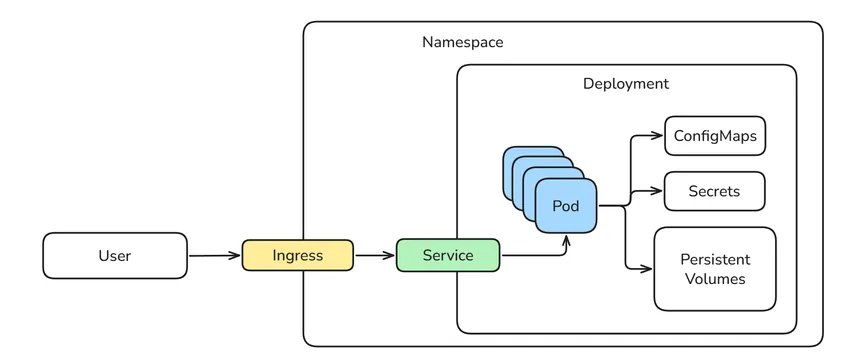
The diagram below shows the main components of a running application in Kubernetes and how they interact. Let’s define them properly.

- Pods: The smallest deployable unit in Kubernetes. Usually one app container, sometimes multiple containers that work together. This is what actually runs your application.
- Deployments: Define how many replicas (pods) of an app should run and which container image to use. Also used to define scaling rules, execute rolling updates and handle automatic restarts/self-healing.
- Services: Give pods a stable internal network address. Pods have their own IP address, they can be destroyed and recreated with a new IP. The service provides a stable name and IP so you don't have to deal with that. It can also balance the loads between pods.
- Ingress: While the service provides a stable address, we still need to know which service to contact. That's the role of Ingress, it is the front door of Kubernetes and reads HTTP requests and forwards them to the right service.
- ConfigMaps and Secrets: For storing configuration values. Useful for app settings, environment variables, feature flags, etc. Of course, Secrets should be used for anything that needs to be kept safe as configmaps are accessible at run time.
- Persistent Volumes: Give storage to apps that need to keep data. Required for databases, uploads, dashboards, analytics, etc.
Storage Tip: The
local-path-provisioner, installed by default with k3s,stores data on your Pi's disk. If you eventually add more Pis to your cluster, you’ll want to look into shared storage like NFS or Longhorn to allow your apps to move between nodes. - Namespaces: Each application deployed on Kubernetes may have all or part of the above mentioned. To stay organised, Kubernetes uses namespaces to separate resources logically inside the same cluster.
How K3s and k8s differ
K3s is a lightweight Kubernetes distribution created by Rancher/SUSE. It is still Kubernetes, but packaged in a way that is much easier to install and run on small machines like a Raspberry Pi.
A normal Kubernetes setup can be quite heavy. You often need to install and configure many pieces yourself: the API server, controller manager, scheduler, kubelet, kube-proxy, CNI networking, ingress controller, storage class, metrics server, and more.
Moreover, k3s uses much less overhead by default making it great for edge devices and Raspberry Pi.
K3s bundles many of these pieces together and provides sensible defaults. The official K3s documentation lists several packaged components that are deployed automatically, including coredns, traefik, local-storage, and metrics-server. K3s also includes its own embedded service load balancer called ServiceLB.
Nonetheless, it is possible to start with a k3s and then change components to get to a full blown k8s. So you won't be locked in to k3s if you start here. So K3s is not a fake Kubernetes or a toy Kubernetes. It is CNCF-certified Kubernetes, but packaged for smaller environments.
What K3s installs by default
One thing I like about K3s is that it gives you a working cluster immediately. You do not start from an empty Kubernetes installation. By default, K3s includes several components that are useful in a homelab.
- Containerd: This is what actually starts and manages containers.
- CoreDNS: Internal DNS for the cluster. Allows pods and services to find each other by name.
- Flannel: Default CNI networking plugin. Creates the pod network so containers can talk to each other.
- Traefik: Default ingress controller.
- ServiceLB: In the cloud, a Kubernetes Service of type LoadBalancer usually creates a real cloud load balancer. At home, there is no AWS, Azure, or Google Cloud load balancer waiting for us. ServiceLB is a lightweight load balancer for bare-metal clusters. Makes LoadBalancer services usable without a cloud provider. But there are other options like NodePort or MetalLB.
- Local-path-provisioner: Simple local storage provider. Lets you create persistent volumes backed by local disk. But It is tied to one machine. Not ideal for multi-node failover. Prefer NFS or Longhorn for true distributed and resilient storage.
- Metrics-server: Collects basic CPU and memory metrics. Needed for commands like kubectl top.
Each of these elements can be replaced by other solution. For example, you can replace traefik with Nginx if you want even more control. This is why K3s feels much easier than a full Kubernetes installation. A lot of the boring setup is already done for you.
That's it! Now you should have Kubernetes installed and understand the main concepts that make it work. In the next chapter, we will deploy our first website using Kubernetes. But first, you might want to learn how to self-host a container registry to speed up your CI/CD pipeline. But first, you might want to learn how to self-host a container registry to speed up your CI/CD pipeline.

Judicael Poumay (Ph.D.)
Follow me on LinkedIn for weekly content Judicaël Poumay
As an independent AI researcher/developer specialized in Natural Language Processing (NLP), I have a comprehensive expertise in the development and integration of AI systems, as well as data analysis.
Is your company looking to integrate AI solutions, analyze data, or strengthen its back-end development? Contact me!
Related Articles
How to deploy a simple application to Kubernetes
Learn how to deploy a basic HTML application to your local Kubernetes cluster. This guide covers building a Docker image, pushing to GitHub Container Registry, and writing essential YAML configurations.
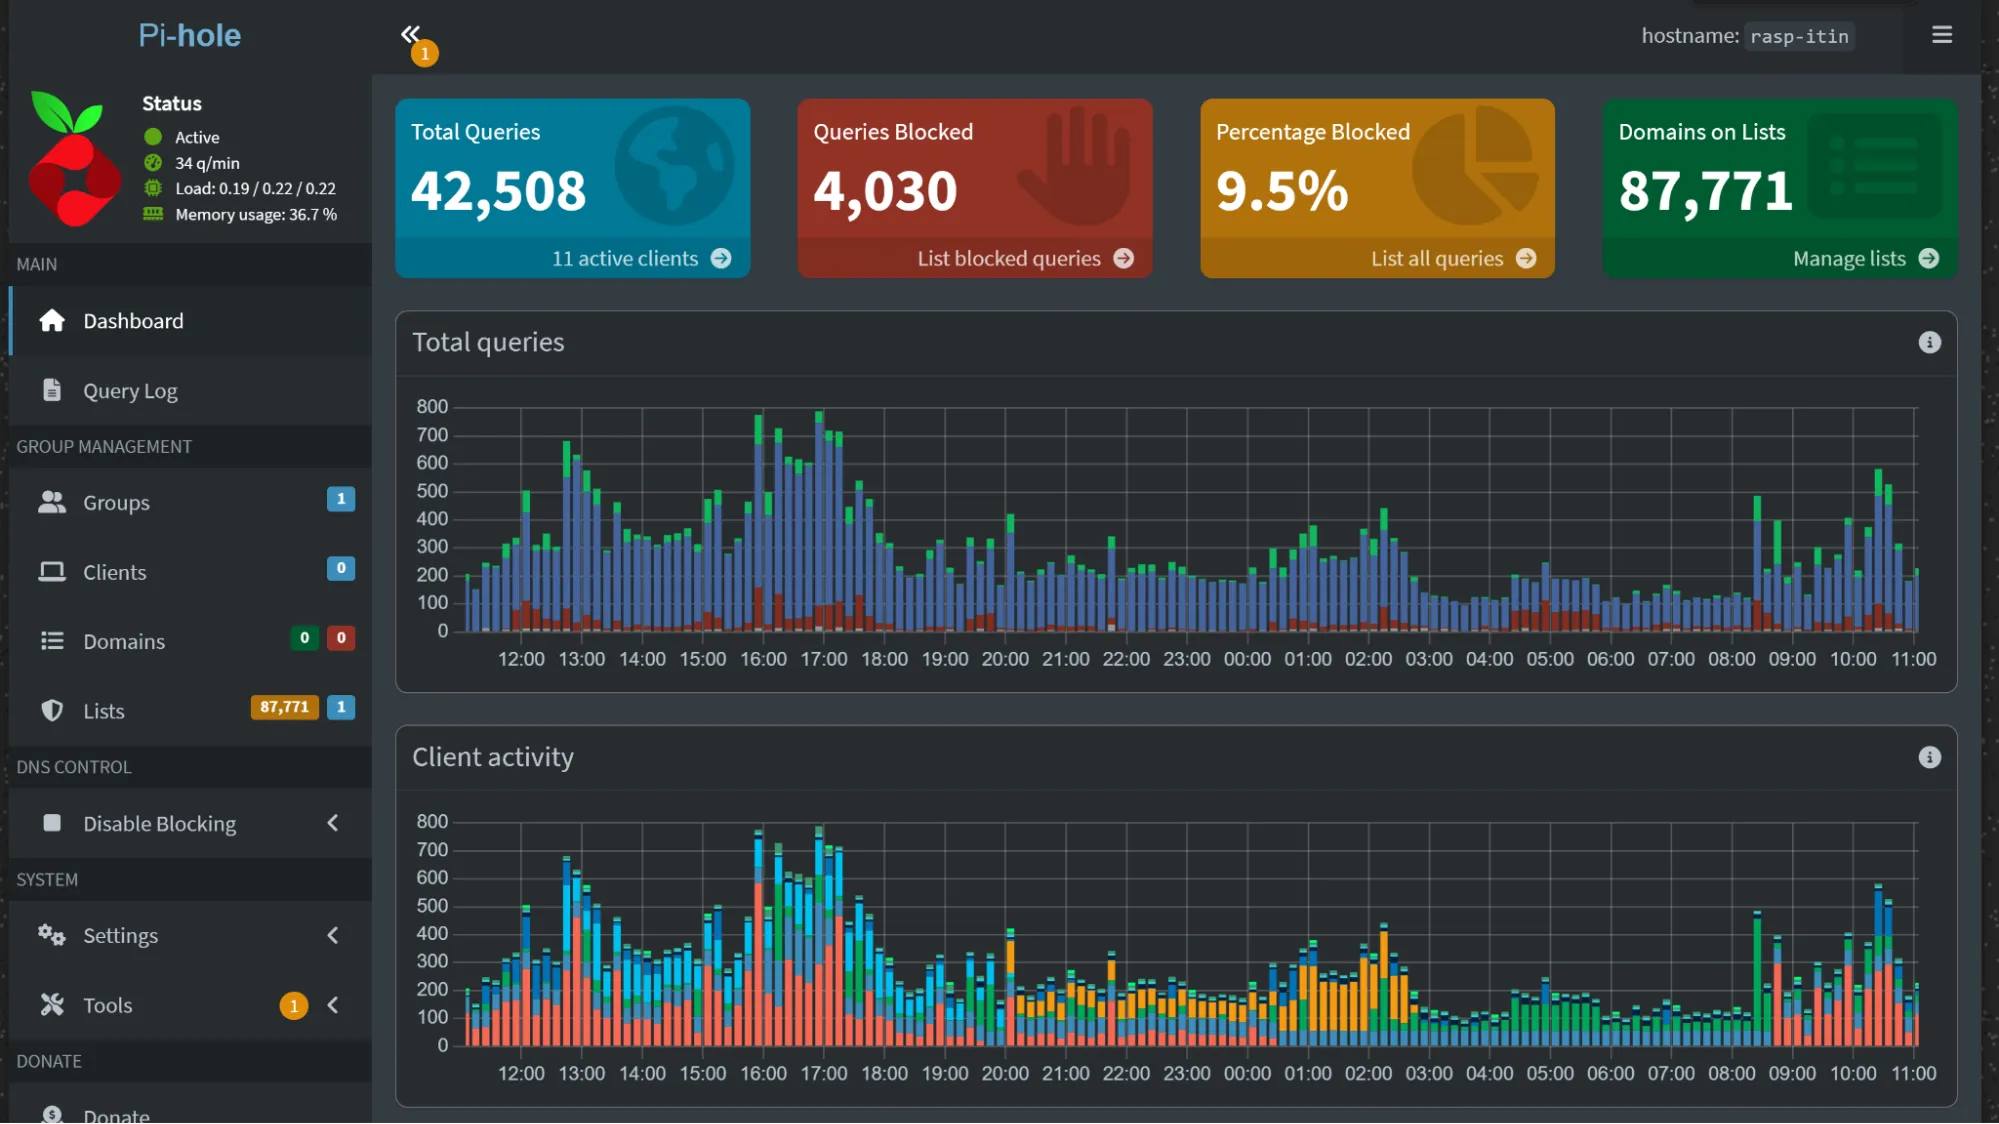
How to install and configure Pi-Hole on a Raspberry Pi 5
Learn how to set up Pi-Hole on a Raspberry Pi 5 to act as a network-wide ad blocker. This guide covers configuring a static IP, installing Pi-Hole, and routing local domains.
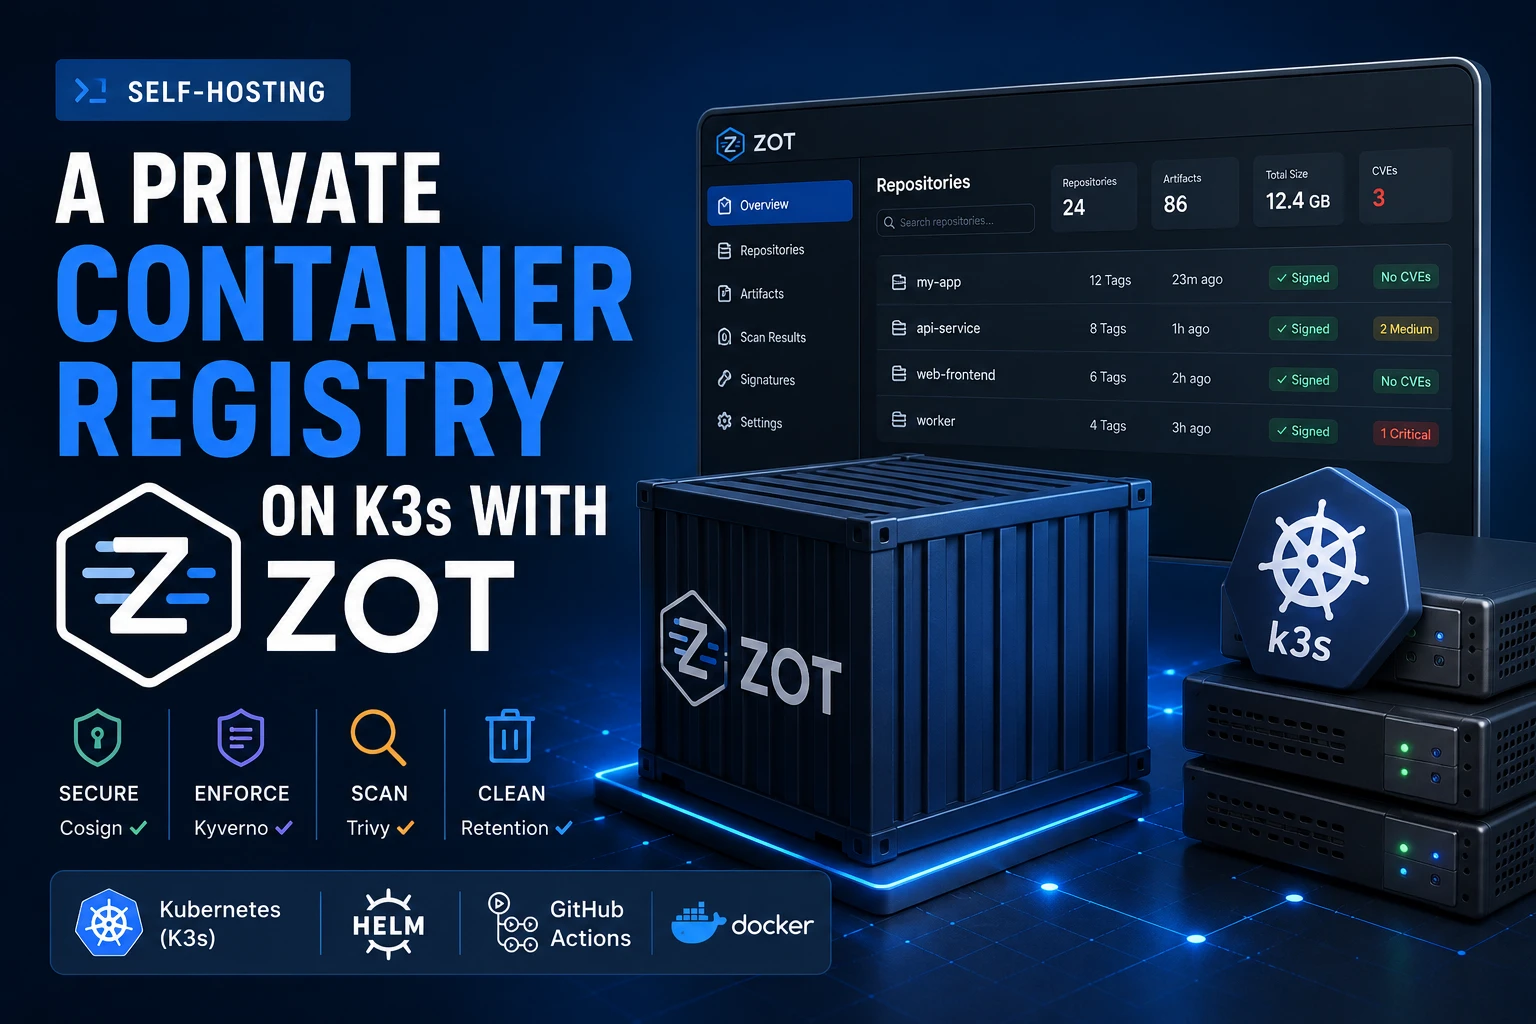
How to self-host a container registry on K3s with Zot
Learn how to self-host a private, production-ready container registry on K3s using Zot. This guide covers Helm installation, CI/CD integration, image signing with Cosign, and vulnerability scanning with Trivy.