How to install and configure Pi-Hole on a Raspberry Pi 5
Note: This guide is designed for Pi-hole v6. If you are using an older version (v5), some configuration commands and the web server behavior may differ.
Now that we have a fully set up Pi 5, let’s add some services. The first one will be Pi-hole. It is a self-hosted DNS server that is able to block ads network-wide. This means no more ads even on your phone, as long as you are connected to your local network!
What’s DNS and what do DNS servers do?
When trying to access websites and internet services, your browser or other network app needs to know where the server is located. This is done via IP, the IP address of a server is a unique identifier for that specific machine on the internet.
However, you don’t type 142.250.110.190 in your browser, that would be hard to remember; instead you type youtube.com. Therefore, something needs to translate this URL into an IP address so your PC knows where to send the request. That is the role of a DNS server; it’s a big phone book for translating URLs.
Actually, the DNS does not translate the whole URL, only the domain. So
https://www.youtube.com/watch?v=Aq5WXmQQooo
Becomes
https://142.250.110.190/watch?v=Aq5WXmQQooo
To be precise, directly typing the IP address won’t even work. That’s because many services may be at the same IP address with the same port. The domain name is also sent along in the request (via the Host header) so the server knows which service to serve.
How can a DNS server block ads?
When you go on a website and see an ad, it was served from a different server, which is usually another address than the website you are visiting. These addresses are known and if you know a URL is used to serve ads, you can block it.
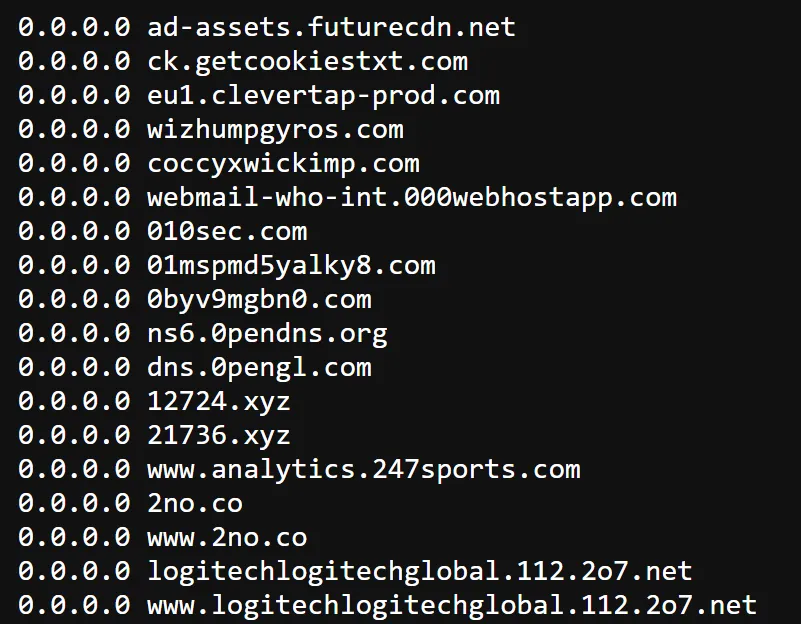
In practice, Pi-Hole has a big database of domains and will always resolve those domains to 0.0.0.0. Meaning they lead nowhere and so no ads are served! Because Pi-Hole operates at the network level, most websites can't detect it, they mostly look for browser extensions like AdBlock. This makes Pi-Hole much more effective.
How to install Pi-Hole?
In this series of articles, my plan is to setup kubernetes on my Pi to serve web apps. However, we cannot deploy Pi-Hole inside Kubernetes. Why? Because Pi-Hole must already be running before the cluster boots; it's a chicken-and-egg problem. The DNS server needs to be reachable at a known IP address, so it has to run directly on the host.
Step 1 : Update the Pi first
If you follow this series, you have already done this but if not, always update your linux distro to get the latest apps :
So via ssh in the pi 5 run :
sudo apt update
sudo apt full-upgrade -y
sudo rebootAfter reboot, reconnect by SSH.
Step 2 : Define a static IP for your Pi
Currently you have a Pi on your network, it might be connected via Wi-Fi or Ethernet; I highly recommend disabling Wi-Fi and using only cabled Ethernet though. This means your Pi has been given a random IP by your router. We want the Pi to keep the same local IP to ensure it is always at the same address.
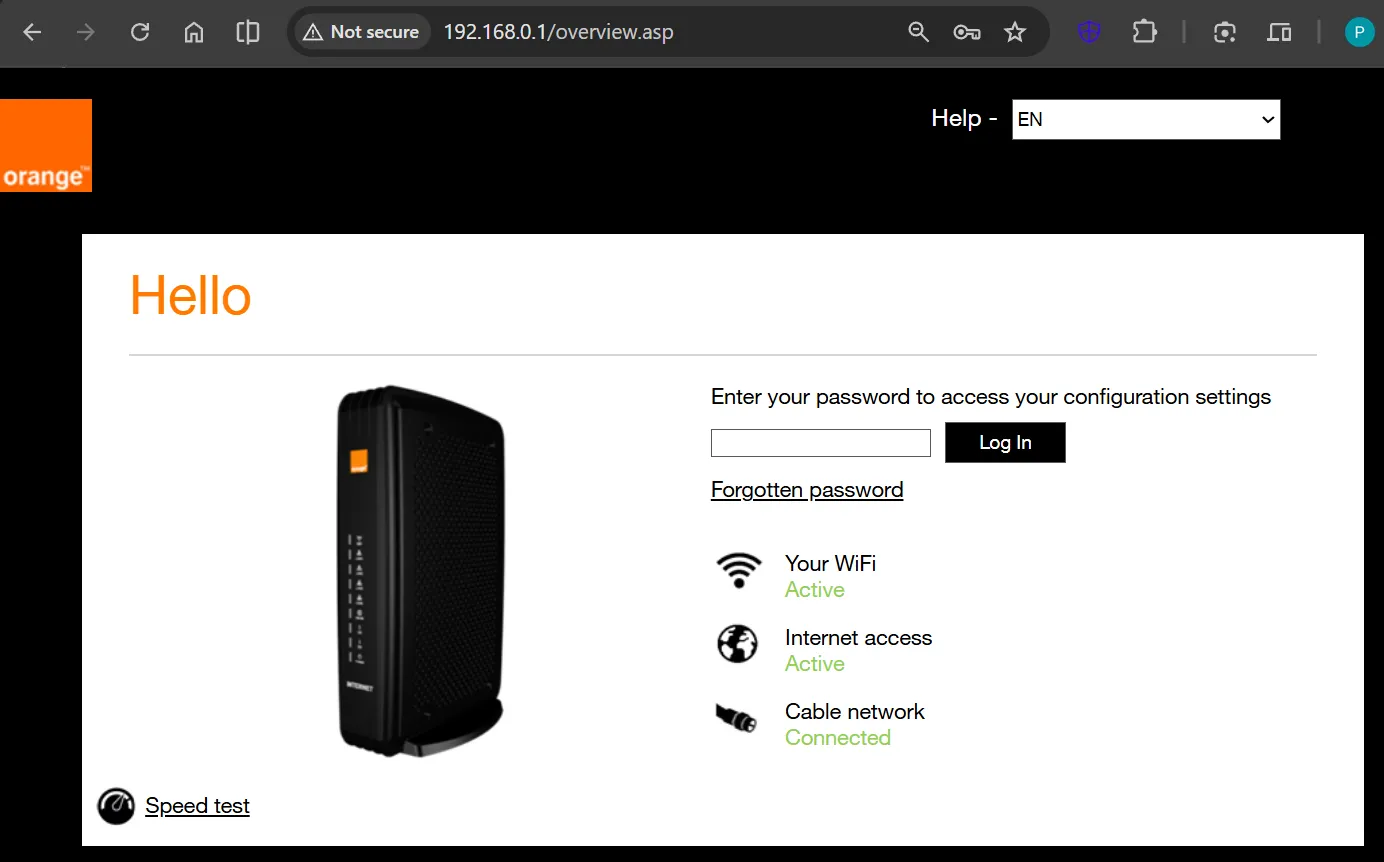
To do this, you will need to access your modem/router at home. This will be highly variable and depends on your ISP. Usually you can try these address directly in your browser, in order of the most likely address:
- 192.168.0.1
- 192.168.1.1
- 192.168.1.254
- 10.0.0.1
- 10.1.1.1
If it doesn’t work try finding documentation for your specific ISP and router/modem.
Once you find the right IP address you should see something similar to this depending on your ISP. You will now need to find the proper password, which should be on the box or some documentation from your ISP.
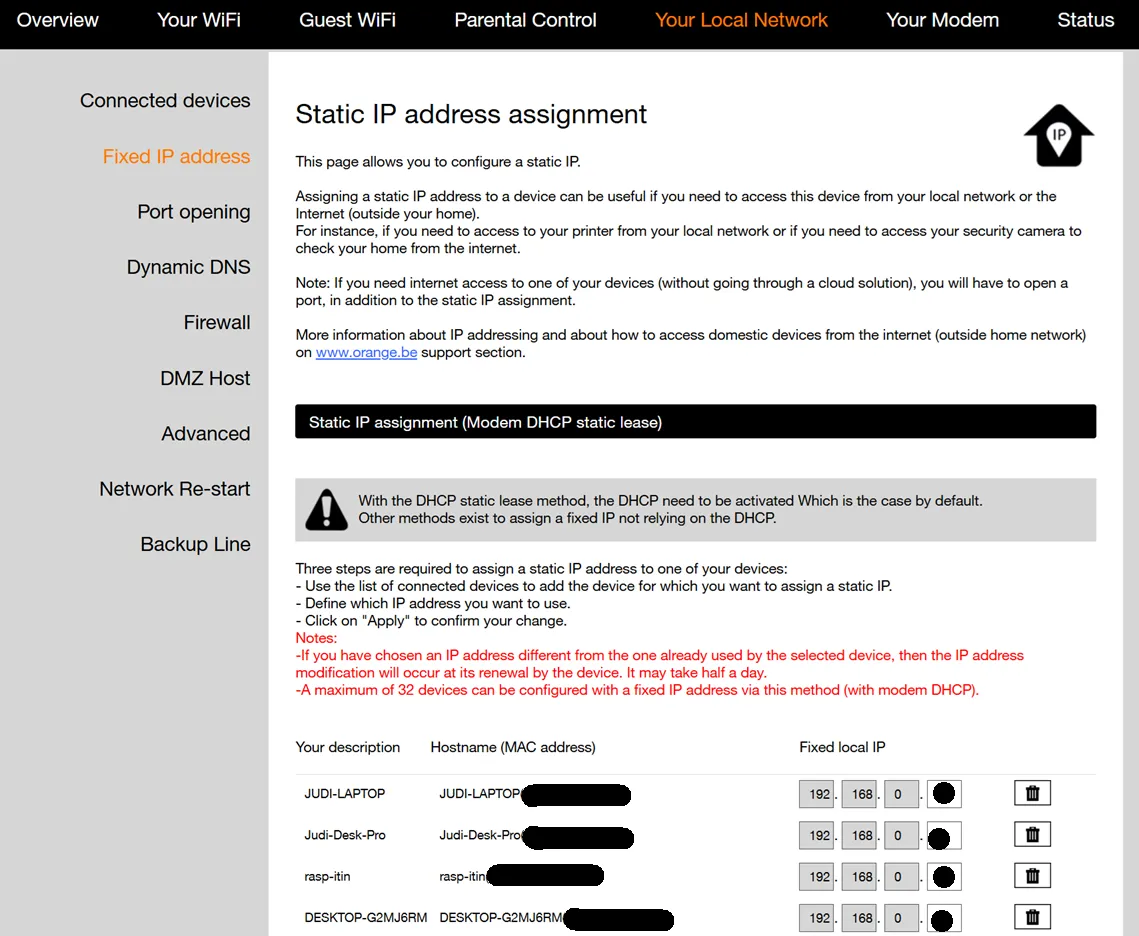
Depending on your ISP, you should find a page similar to this, where you can define a fixed IP address for the various devices connected on your network. Look for settings labeled "Static Lease", "DHCP Reservation", or "Static IP". Here you need to be careful, a device is not the Pi but the MAC address of the network interface. So if you have both Wi-Fi and ethernet on your Pi, you will see your Pi twice.
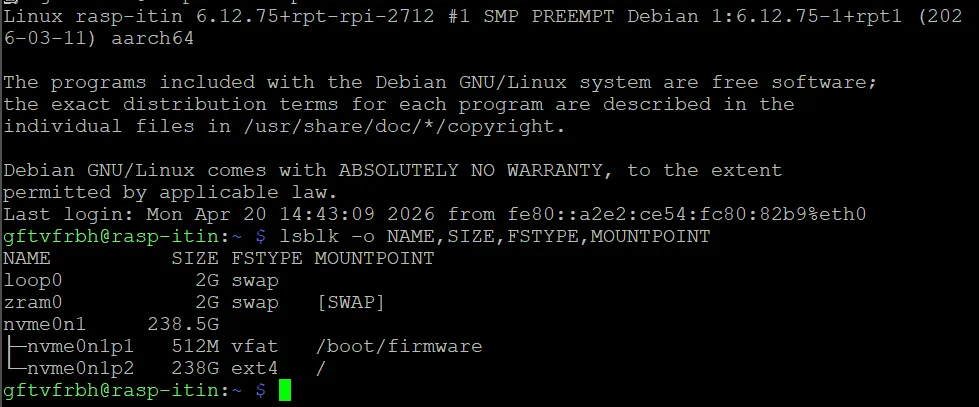
Run this command:
ip -o link | awk '/link\/ether/ {print $2, $(NF-2)}'And you will get something like:
eth0: 2c:cf:67:12:34:56
wlan0: dc:a6:32:ab:cd:ef
lo: 00:00:00:00:00:00 Use the mac address of eth0 if you want to use wired Ethernet or wlan0 to use the wi-fi. Then you can choose an IP, I suggest keeping the one already in use. For me it was 192.168.0.14.
Step 3 : Install Pi-Hole
Now let’s install Pi-Hole with:
curl -sSL https://install.pi-hole.net | bashNote: Piping a script from the internet to
bashrequires trust. If you want, You can review the installer script on GitHub before running it.
During the installer:
- choose your network interface (the one with a static IP so either eth0 or wlan0)
- choose your upstream DNS ( Google or cloudflare is fine, but you get to decide)
At some point, the installer will give you a password, don’t forget to note it down. You can change it later using:
sudo pihole setpasswordStep 4 : Move the dashboard/API off port 80
By default, the Pi-Hole dashboard uses the port 80 of the Pi5. However, we want to keep that port for web services we will deploy on Kubernetes in a later chapter. Hence, we will move the dashboard to port 8081 by running this :
sudo pihole-FTL --config webserver.port "8081,[::]:8081"
sudo systemctl restart pihole-FTLVerify port 80 is no longer used by Pi-hole :
sudo ss -ltnp | grep -E ':80|:8081'You want to see Pi-hole listening on 8081, not 80.
You can also check Pi-hole status:
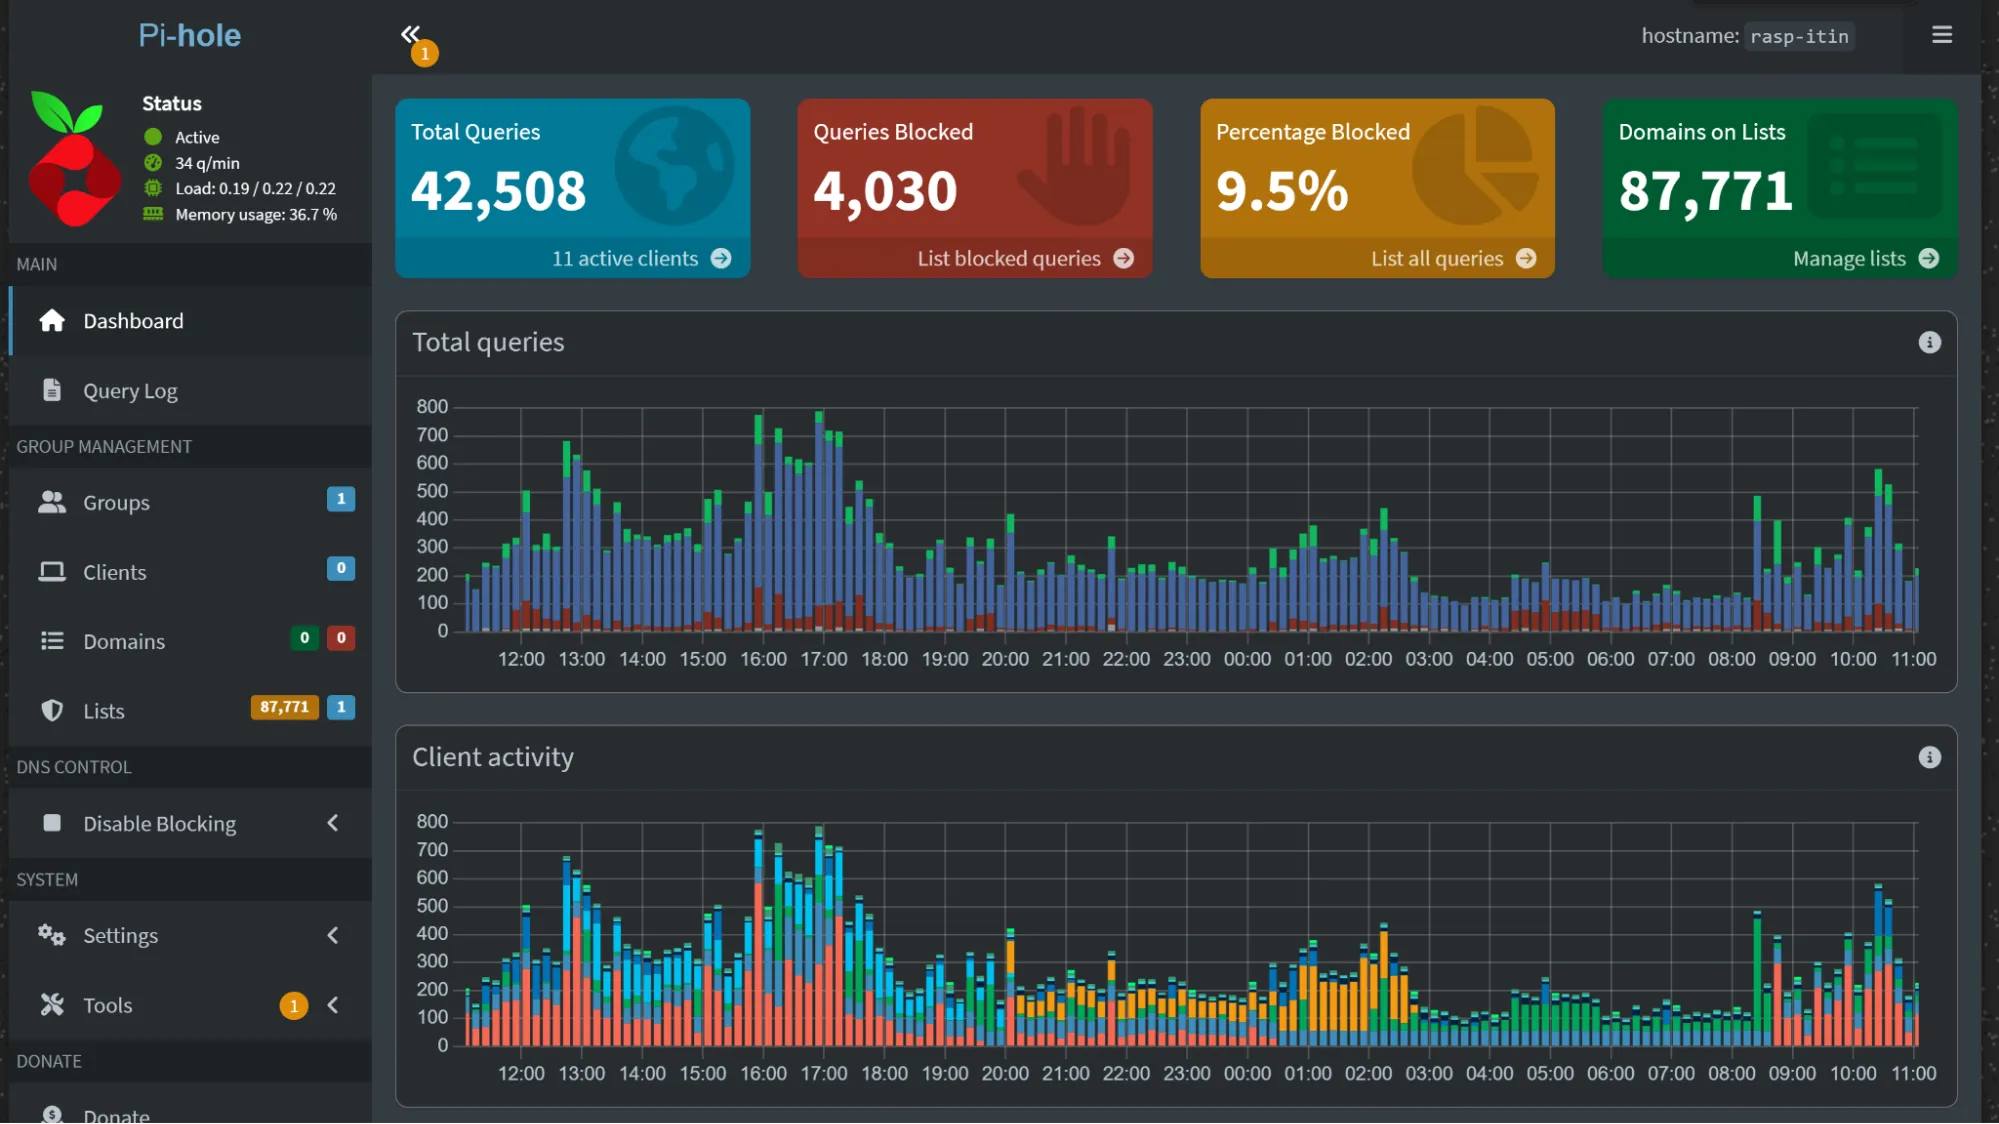
sudo pihole statusThen open the dashboard using the static IP of your Pi and connect using your password :
Pi-Hole should be running now!
Step 5 : Make your network use Pi-hole
We are not quite done yet. Pi-Hole is running, but nothing on your network is using it yet. It is your router that decides which DNS server to use network-wide. You can also set up the DNS at the device level if you want to but let’s do it on the router.
In your router, you should find a page to define the DNS, it looks something like this:
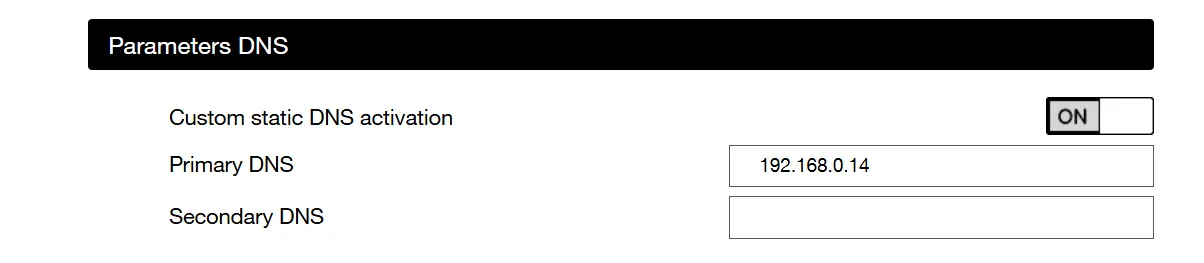
Point your router’s DNS, or each client’s DNS, to the Pi’s IP address and save!
Now we need to make sure the change has been applied and we are not using a cached DNS. You can restart your modem and PC to do this. You can also flush the DNS cache of your PC:
Windows:
ipconfig /flushdnsLinux with systemd-resolved:
sudo resolvectl flush-cachesmacOS:
sudo dscacheutil -flushcache; sudo killall -HUP mDNSResponderThen run something like:
nslookup youtube.comAnd you should be served by your pi now !
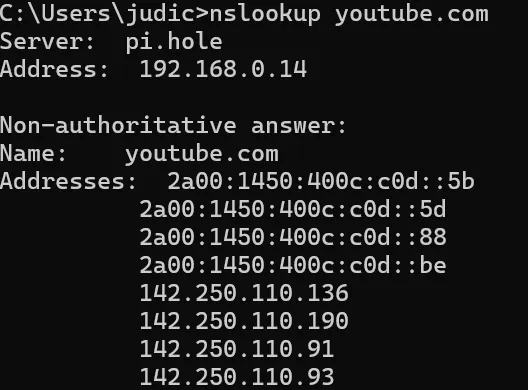
If something goes wrong: If your internet stops working after changing the DNS, go back to your router settings and set the DNS back to automatic. This will restore normal operation while you debug.
Go on some website known for having many ads and check if you can still see them, they should be gone !
In the Pi-Hole dashboard you should be able to see Queries being blocked and more!

Forward .home.arpa domains to your Pi
Now that we have a DNS server, let's put it to use so we don't have to type the Pi's IP address to access the dashboard. We use the top-level domain .home.arpa as it is the standard choice for private home-network DNS. By using .home.arpa, you ensure that your local domain will never conflict with a public domain name.
You have two options depending on your setup:
Option A: Forward a single domain
If you only need Pi-Hole on a friendly URL, forward just pihole.home.arpa to the Pi:
sudo pihole-FTL --config misc.dnsmasq_lines '["address=/pihole.home.arpa/192.168.0.14"]'
sudo systemctl restart pihole-FTLThe dashboard is now accessible (only inside your local network) at:
http://pihole.home.arpa:8081/admin
Option B: Forward all *.home.arpa (my choice)
If your Pi will host multiple services (e.g. via Kubernetes), you can forward everything ending with .home.arpa to it:
sudo pihole-FTL --config misc.dnsmasq_lines '["address=/.home.arpa/192.168.0.14"]'
sudo systemctl restart pihole-FTLSince Kubernetes handles internal routing, it will know which service to serve for which address on port 80.
A side effect is that the Pi-Hole dashboard becomes accessible through any .home.arpa domain on port 8081 (e.g. http://anything.home.arpa:8081/admin). Since nothing else uses that port, this is fine.
Verify
Whichever option you chose, verify it works:
nslookup pihole.home.arpaYou should see it resolving to your Pi's IP address.
That's it, we are done! We now have a self-hosted DNS server that blocks ads network-wide, and we've set up local domain routing with .home.arpa. I am now the proud owner of my own DNS server — and you are too if you followed along! In the next chapter, we will set up Kubernetes on the Pi.

Judicael Poumay (Ph.D.)
Follow me on LinkedIn for weekly content Judicaël Poumay
As an independent AI researcher/developer specialized in Natural Language Processing (NLP), I have a comprehensive expertise in the development and integration of AI systems, as well as data analysis.
Is your company looking to integrate AI solutions, analyze data, or strengthen its back-end development? Contact me!
Related Articles
How to set up a Raspberry Pi 5 with a PoE HAT and an NVMe SSD
Learn how to build a compact, power-efficient homelab server using a Raspberry Pi 5. This guide covers hardware selection, assembling a PoE HAT with an NVMe SSD, and initial boot configuration.
How to install Kubernetes K3s on a Raspberry Pi 5
Learn how to install and configure K3s, a lightweight Kubernetes distribution, on a Raspberry Pi 5. This guide covers enabling cgroups, setting up the cluster, and configuring remote access with kubectl.
How to move the Raspberry Pi 5 OS to an NVMe SSD
Learn how to manually migrate your Raspberry Pi 5 operating system from a USB stick or SD card to a faster NVMe SSD. This step-by-step guide covers partitioning, copying files, updating boot configurations, and avoiding common pitfalls.